Contents
- 1 Introduction
- 2 Requirements
- 3 Directions
- 4 General Tips and What to Bring
- 5 Ideal Party Composition
- 6 Understanding Boss Protocol and Green Aura’d MVPs
- 7 Notable new skills/attributes of Green Aura’d MVPs
- 8 Understanding Earthquake
- 9 Disabled Skills
- 10 Quick Cheat Sheet for MVPs
- 11 Element Levels
- 12 Stats/Strategy for each MVP
- 13 List of Mobs per Floor:
- 13.1 Floor 1
- 13.2 Floor 2
- 13.3 Floor 3
- 13.4 Floor 4
- 13.5 Floor 5
- 13.6 Floor 6
- 13.7 Floor 7
- 13.8 Floor 8
- 13.9 Floor 9
- 13.10 Floor 10
- 13.11 Floor 11
- 13.12 Floor 12
- 13.13 Floor 13
- 13.14 Floor 14
- 13.15 Floor 15
- 13.16 Floor 16
- 13.17 Floor 17
- 13.18 Floor 18
- 13.19 Floor 19
- 13.20 Floor 20
- 13.21 Floor 21
- 13.22 Floor 22
- 13.23 Floor 23
- 13.24 Floor 24
- 13.25 Floor 25
- 13.26 Floor 26
- 13.27 Floor 27
- 13.28 Floor 28
- 13.29 Floor 29
- 13.30 Floor 30
- 13.31 Floor 31
- 13.32 Floor 32
- 13.33 Floor 33
- 13.34 Floor 34
- 13.35 Floor 35
- 13.36 Floor 36
- 13.37 Floor 37
- 13.38 Floor 38
- 13.39 Floor 39
- 13.40 Floor 40
- 13.41 Floor 41
- 13.42 Floor 42
- 13.43 Floor 43
- 13.44 Floor 44
- 13.45 Floor 45
- 13.46 Floor 46
- 13.47 Floor 47
- 13.48 Floor 48
- 13.49 Floor 49
- 13.50 Floor 50
- 13.51 Floor 51
- 13.52 Floor 52
- 13.53 Floor 53
- 13.54 Floor 54
- 13.55 Floor 55
- 13.56 Floor 56
- 13.57 Floor 57
- 13.58 Floor 58
- 13.59 Floor 59
- 13.60 Floor 60
- 13.61 Floor 61
- 13.62 Floor 62
- 13.63 Floor 63
- 13.64 Floor 64
- 13.65 Floor 65
- 13.66 Floor 66
- 13.67 Floor 67
- 13.68 Floor 68
- 13.69 Floor 69
- 13.70 Floor 70
- 13.71 Floor 71
- 13.72 Floor 72
- 13.73 Floor 73
- 13.74 Floor 74
- 13.75 Floor 75
- 13.76 Floor 76
- 13.77 Floor 77
- 13.78 Floor 78
- 13.79 Floor 79
- 13.80 Floor 80
- 13.81 Floor 81
- 13.82 Floor 82
- 13.83 Floor 83
- 13.84 Floor 84
- 13.85 Floor 85
- 13.86 Floor 86
- 13.87 Floor 87
- 13.88 Floor 88
- 13.89 Floor 89
- 13.90 Floor 90
- 13.91 Floor 91
- 13.92 Floor 92
- 13.93 Floor 93
- 13.94 Floor 94
- 13.95 Floor 95
- 13.96 Floor 96
- 13.97 Floor 97
- 13.98 Floor 98
- 13.99 Floor 99
- 13.100 Floor 100
- 13.101 Floor 101
- 14 Videos
Introduction
Endless Tower (ET) is a weekly instance in Ragnarok Online set in a tall abandoned 101-floor tower near the Alberta port. The Tower houses waves of normal and boss-protocol mobs, where each floor gets progressively more difficult than the previous floor.
MVPs/Bosses in the tower include field MVPs and endless tower-exclusive MVPs, such as Entweihen Crothen and Naght Sieger (who drop combinable weapons that are obtainable exclusively from this instance).
The time limit for this instance is 4 hours.
Author’s Note: This guide was made for Ragnarok GGH, a renewal official server. The mechanics and tips stated here may not apply for other servers.
Requirements
- Base level 50
- In a Party (if solo, you should be party leader)
- 10,000 Zeny (per person)
- Instance not in cooldown
- Cooldown is one week or 7 days.
Directions
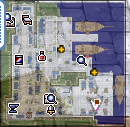
- Warp to Alberta. Find Captain Janssen in the lower-right portion of the city (alberta 214, 77).
- Talk to Capt. Janssen. He will tell you the story of how he and his crew ended being washed upon a tall creepy tower. When asked, pay him 10,000 Zeny.

- Talk to him again and choose “Let’s go now!”. He will warp you to Misty Island.

- To start the instance, the party leader needs to press and talk to the Tower Protection Stone.
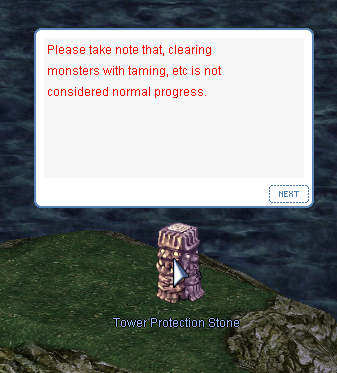
- A prompt will pop up for all party members that the instance has been created. Wait for the queue to finish.
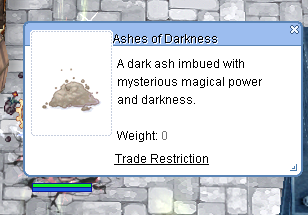
- Once the queue is finished, each party member will need to talk to the Tower Protection Stone to enter the instance. Each player will be given 2 Ashes of Darkness.
- Ashes of Darkness can be used to re-enter the tower and go back to either Floor 26, Floor 51, Floor 76 or Floor 100 (depending on what floors your party has cleared so far) by talking to Immortal Brazier (the hanging fire pit above your character in the first floor of the actual tower).
- Each 25 floor jump costs 1 Ash of Darkness.
- Once inside, clear the mobs on each floor. See Floor Mobs list below.
- Ashes of Darkness will be given upon completing Floors 25, 50, 75 and 100.
- Once ALL the mobs are cleared in a floor, a portal will appear on the far end of the room for the next floor. There are 101 floors.
- If you do not see a portal, some mobs are still alive.
- Tip: use ruwach or sight. Some mobs hide.
- If you do not see a portal, some mobs are still alive.
- MVPs are stationed on every fifth floor. These floors have green tiles.
- When you reach the 100th floor, you’ll have to face and defeat Entweihen Crothen.
- Once you kill Entweihen Crothen, go to the upper left of the same map and talk to Lucid Crystal. [Note: If this is your first time clearing this instance, you will be warped to Alberta after talking to Lucid Crystal]
- You will be warped to the 101st Floor. Walk up from the Castle Entrance.

- Inside the castle, wipe the following mobs that will summon in batches:
- 100 Orc Skeleton
- 60 Wind Ghost
- 40 Khalitzburg
- After clearing these mobs, Naght Sieger will spawn. Defeat him.

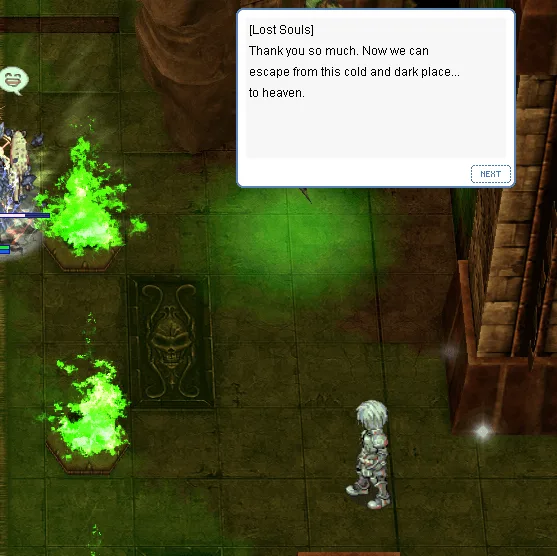
- After defeating him, talk to the Lost Soul in the same area to leave the tower.
- Optional: You could craft Violet Fear on the 101st floor if you managed to loot or collect both Twin Edge of Naght Siger (Red) and (Blue).
General Tips and What to Bring
- Carry equipments/cards that boost damage against boss-protocol mobs (see Lord of Death, Shield of Death, Absymal Knight Card) and reduce damage from boss-protocol mobs (see Alice Card). MVPs are boss protocol.
- Other gear useful to bring for ET: Fire-elemental armor, fire and wind resist potions, neutral resist cards/armor (raydric, deviling, ghostring), shadow elemental armor
- Carry lots of status-curing potions (see Green Potion, Panacea, Holy Water). Most MVPs inflict statuses that can make or break runs. Archbishops should be ready with Lauda and/or Status Recovery
- Bring a creator/genetic for full chemical protection (FCP) and/or a whitesmith/mechanic for repair. Some MVPs either break your gear or strip you.
- Bring different elements of ammunition. Each MVP has a different element than the previous one. Some elements (like Neutral) miss one some MVPs (like Ghost MVPs).
- Some MVPs and mobs hide, bring a Horong-carded accessory if your character does not have a detecting skill.
- Unlike field bosses, bosses in ET do not teleport. Feel free to trap and kite bosses in ET.
- Bring Tokens of Siegfried in case your Archbishop dies or in case of a full party wipe.
- It is helpful to carry Kafra Cards or a Kafra Storage Bell. There are a lot of heavy loot in ET. You may also want to restock on pots.
- Needless to say, carry lots of healing potions for both HP and SP.
- Ask your best dps to pop that bubble gum for the item drop increase.
- Stay calm when you get disconnected. You will still spawn inside the tower still upon log-in (June 30 patch).
Ideal Party Composition
- Ideal party composition would be:
- A tank (Sura for Mental Strength)
- A minstrel for Poem of Bragi
- An archbishop for healing, status recovering, and resurrecting
- A sorcerer for Land protector and Dispell
- A genetic for full chemical protection.
- Mix of physical (RK, RG, Gene, Ranger, GX, Mech) and magical DPS (Warlock, Sorcerer, Oboro)
Understanding Boss Protocol and Green Aura’d MVPs
- MVPs and mini-mvps are specially tagged as boss protocol mobs. Skills and items work differently towards them. Some notable skill/attribute differences are:
- Damage/Resist against them is not affected by cards/equipment that increase damage to/resist against “normal” monsters. Their damage/resist against them is affected by cards/equipment that increase damage against “boss” mobs (see Abysmal Knight Card, Alice Card).
- Some skills fail on them (steal, intimidate, provoke, kaite)
- Some skills work differently (spell breaker’s success chance is reduced to 10% and ankle snare’s hold time is reduced)
- They cannot be knocked back.
- They detect hidden targets.
- They are generally unaffected by status effects (like stun, silence, poison, etc.), with exceptions (quagmire still slows them down).
- On July 18, 2018, Renewal (kRO) added green auras to most MVPs. GGH has had this update since the beginning of the server. Green aura’d MVPs have more skills/attributes than normal MVPs.
Notable new skills/attributes of Green Aura’d MVPs
- Damage Resist. They only take 10% of the damage normally received by non-green aura’d MVPs.
- Damage-to-Recovery Conversion. This is the most important skill addition that you should observe/note. Green aura’d MVPs can recover/heal damage received for a certain damage type (it can be either physical, magical, or special) for a certain period. When you observe this happening from a DPS source, stop (if it’s you) or ask your DPS to stop hitting. Request a different damage-type DPS to hit instead (i.e., if it heals on physical damage, ask your warlock to DPS with magical damage in the meantime).

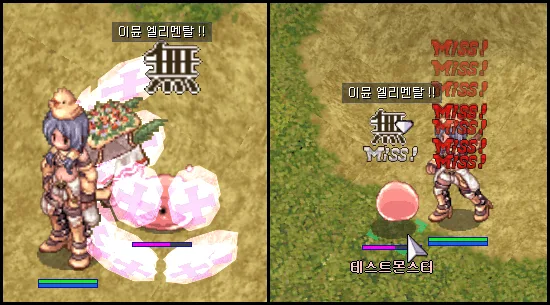
- Elemental Immune. Some green aura’d MVPs will also be immune to a particular element for a period of time. A sign for that particular element will appear on top of the MVP (note their color. Blue is water, Fire is red, etc.). When this happens, change element. Here are the signs:
- Wide pull or wide death grasp. Some green aura’d MVPs can also pull your whole party to their location without warning.
- Note: There are more skills not included in this guide.
- Tip: Ask your Archbishop to cast multiple Clearance on the MVP when you notice elemental immunity and damage-to-health conversion.
Understanding Earthquake

- Earthquake (EQ) is one of the signature party-wiping of skills of select MVPs and you will be facing some of these MVPs in ET (Baphomet, Orc Lord, Valkyrie Randgris, Ifrit, among others)
- EQ mechanics:
- EQ inflicts neutral magical damage in a huge AoE around the boss (caster).
- The damage will be split among all players within the AoE of the skill. Thus, if you are running with a big party for ET, it would be best to tank the EQ instead of running from it.
- Sample of skills that work: Mental Strength/Steel Body, Energy Coat, White Imprison.
- Sample of skills that do not work: Land Protector/Magnetic Earth, Pneuma, Safety Wall.
- Sample of items that work: ghostring card, magic reflecting gear, maya card, GTB card.
- Sample of items that do not work: raydric card, noxious card, alice card.
- Best way to spot it is to watch out for a long cast time.
Disabled Skills
Some skills and items are disabled in Endless Tower. These include:
- Ice Wall
- Warg Bite
- Teleport or Fly Wing
- Leap
- Fiber Lock
- Sheltering Bliss (an ensemble skill)
- Reflect Damage
- Snatch/Intimidate
Quick Cheat Sheet for MVPs
(Note: table not recommended to be viewed on mobile)
| Floor | MVP Name | MVP Race | MVP Element | Best Element to Use | Size |
| 5 | Golden Thief Bug | Insect | Fire 2 | Water | Large |
| 10 | Mistress | Insect | Wind 4 | Earth | Small |
| 15 | Phreeoni | Brute/Beast | Neutral 3 | Any except Ghost | Large |
| 15 | Maya | Insect | Earth 4 | Fire | Large |
| 20 | Drake | Undead | Undead 1 | Holy or Fire | Medium |
| 25 | Moonlight Flower | Demon | Fire 3 | Water | Medium |
| 30 | White Lady | Demihuman | Wind 3 | Earth | Large |
| 35 | Turtle General | Brute/Beast | Earth 2 | Fire | Large |
| 40 | Incantation Samurai | Demihuman | Shadow 3 | Holy | Large |
| 45 | Osiris | Undead | Undead 4 | Holy or Fire | Medium |
| 50 | Pharaoh | Demihuman | Shadow 3 | Holy | Large |
| 50 | Amon Ra | Demihuman | Earth 3 | Fire | Large |
| 55 | Evil Snake Lord | Beast/Brute | Ghost 3 | Ghost (avoid Neutral) | Large |
| 60 | Doppelganger | Demon | Shadow 3 | Holy | Medium |
| 60 | Egnigem Cenia | Demihuman | Fire 2 | Water | Medium |
| 65 | Atroce | Brute/Beast | Shadow 3 | Holy | Large |
| 70 | Orc Hero | Demihuman | Earth 2 | Fire | Large |
| 70 | Orc Lord | Demihuman | Earth 2 | Fire | Large |
| 75 | Dark Lord | Demon | Undead 4 | Holy or Fire | Large |
| 75 | Baphomet | Demon | Shadow 3 | Holy | Large |
| 80 | Fallen Bishop Hibram | Demon | Shadow 2 | Holy | Medium |
| 85 | Ifrit | Formless | Fire 4 | Water | Large |
| 90 | Valkyrie Randgris | Angel | Holy 4 | Shadow (avoid elements) | Large |
| 95 | Beelzebub | Demon | Ghost 4 | Ghost (avoid neutral) | Small/Large |
| 100 | Entweihen Crothen | Demon | Shadow 4 | Holy | Medium |
| 101 | Naght Seiger | Demon | Ghost 4 | Ghost (avoid neutral) | Large |
Element Levels
In renewal, mobs have different levels of defending elements. The resistances and weaknesses of a defending element are amplified relative to its level. Attacking elements are not separated into levels. The defending elements span until level 4.
The table below shows the attacking element in columns (vertical), and defending element in rows (horizontal). If the cell is beyond 100%, meaning the attacking element has increased damage over the defending element. Less than 100% means reduced damage. For example, Fire attacks deal 150% damage to Earth monsters.
Tip: Use Sense (2nd job skill) to see a mob’s characteristics/element/size/race.
(a) Defending Element (horizontal/rows) Level 1
| Neutral | Water | Earth | Fire | Wind | Poison | Holy | Shadow | Ghost | Undead | |
| Neutral | 100% | 100% | 100% | 100% | 100% | 100% | 100% | 100% | 70% | 100% |
| Water | 100% | 25% | 100% | 90% | 175% | 100% | 100% | 100% | 100% | 100% |
| Earth | 100% | 100% | 25% | 150% | 90% | 125% | 100% | 100% | 100% | 100% |
| Fire | 100% | 150% | 90% | 25% | 100% | 125% | 100% | 100% | 100% | 100% |
| Wind | 100% | 90% | 150% | 100% | 25% | 125% | 100% | 100% | 100% | 100% |
| Poison | 100% | 100% | 100% | 100% | 100% | 0% | 100% | 50% | 100% | 50% |
| Holy | 100% | 75% | 75% | 75% | 75% | 75% | 0% | 125% | 75% | 100% |
| Shadow | 100% | 100% | 100% | 100% | 100% | 50% | 125% | 0% | 75% | 0% |
| Ghost | 70% | 100% | 100% | 100% | 100% | 100% | 100% | 100% | 125% | 100% |
| Undead | 100% | 100% | 100% | 125% | 100% | −25% | 150% | −25% | 100% | 0% |
(b) Defending Element (horizontal/rows) Level 2
| Neutral | Water | Earth | Fire | Wind | Poison | Holy | Shadow | Ghost | Undead | |
|---|---|---|---|---|---|---|---|---|---|---|
| Neutral | 100% | 100% | 100% | 100% | 100% | 100% | 100% | 100% | 50% | 100% |
| Water | 100% | 0% | 100% | 80% | 175% | 75% | 100% | 100% | 75% | 75% |
| Earth | 100% | 100% | 0% | 175% | 80% | 125% | 100% | 100% | 75% | 75% |
| Fire | 100% | 175% | 90% | 0% | 100% | 125% | 100% | 100% | 75% | 75% |
| Wind | 100% | 80% | 175% | 100% | 0% | 125% | 100% | 100% | 75% | 75% |
| Poison | 100% | 100% | 100% | 100% | 100% | 0% | 100% | 25% | 75% | 25% |
| Holy | 100% | 50% | 50% | 50% | 50% | 50% | −25% | 150% | 50% | 125% |
| Shadow | 100% | 75% | 75% | 75% | 75% | 25% | 150% | −25% | 50% | 0% |
| Ghost | 50% | 100% | 100% | 100% | 100% | 75% | 100% | 100% | 150% | 100% |
| Undead | 100% | 100% | 100% | 150% | 100% | −50% | 175% | −50% | 125% | 0% |
(c) Defending Element (horizontal/rows) Level 3
| Neutral | Water | Earth | Fire | Wind | Poison | Holy | Shadow | Ghost | Undead | |
|---|---|---|---|---|---|---|---|---|---|---|
| Neutral | 100% | 100% | 100% | 100% | 100% | 100% | 100% | 100% | 0% | 100% |
| Water | 100% | −25% | 100% | 70% | 200% | 50% | 100% | 100% | 50% | 50% |
| Earth | 100% | 100% | -25% | 200% | 70% | 100% | 100% | 100% | 50% | 50% |
| Fire | 100% | 200% | 70% | −25% | 100% | 100% | 100% | 100% | 50% | 50% |
| Wind | 100% | 70% | 200% | 100% | −25% | 100% | 100% | 100% | 50% | 50% |
| Poison | 100% | 100% | 100% | 100% | 100% | 0% | 125% | 0% | 50% | 0% |
| Holy | 100% | 25% | 25% | 25% | 25% | 25% | −50% | 175% | 25% | 150% |
| Shadow | 100% | 50% | 50% | 50% | 50% | 0% | 175% | −50% | 25% | 0% |
| Ghost | 0% | 100% | 100% | 100% | 100% | 50% | 100% | 100% | 175% | 100% |
| Undead | 100% | 125% | 100% | 175% | 100% | −75% | 200% | −75% | 150% | 0% |
(d) Defending Element (horizontal/rows) Level 4
| Neutral | Water | Earth | Fire | Wind | Poison | Holy | Shadow | Ghost | Undead | |
| Neutral | 100% | 100% | 100% | 100% | 100% | 100% | 100% | 100% | 0% | 100% |
| Water | 100% | −50% | 100% | 60% | 200% | 25% | 75% | 75% | 25% | 25% |
| Earth | 100% | 100% | −50% | 200% | 60% | 75% | 75% | 75% | 25% | 25% |
| Fire | 100% | 200% | 60% | −50% | 100% | 75% | 75% | 75% | 25% | 25% |
| Wind | 100% | 60% | 200% | 100% | −50% | 75% | 75% | 75% | 25% | 25% |
| Poison | 100% | 75% | 75% | 75% | 75% | 0% | 125% | −25% | 25% | −25% |
| Holy | 100% | 0% | 0% | 0% | 0% | 0% | −100% | 200% | 0% | 175% |
| Shadow | 100% | 25% | 25% | 25% | 25% | −25% | 200% | −100% | 0% | 0% |
| Ghost | 0% | 100% | 100% | 100% | 100% | 25% | 100% | 100% | 200% | 100% |
| Undead | 100% | 150% | 50% | 200% | 100% | −100% | 200% | −100% | 175% | 0% |
Stats/Strategy for each MVP

- Golden Thief Bug (Floor 5)
- Element: Fire 2
- Use Water
- Race: Insect
- HP: 222,750
- Watch out for Shield Reflect
- You can dispell the Shield Reflect or switch to long-range or magical DPS.
- Uses Magnum Break
- If burst DPS is not high enough, GTB can hide.
- Prepare detect skills/items (see Horong Card).
- Element: Fire 2

- Mistress (Floor 10)
- Element: Wind 4
- Use Earth
- Race: Insect
- HP: 378,000
- Watch out for Jupitel Thunder.
- Wear wind-element armor or use wind resist potion.
- Element: Wind 4

- Phreeoni (Floor 15)
- Element: Neutral 3
- Use any element except Ghost
- Race: Brute
- HP: 300,000
- Phreeoni spams Wide Stone Curse/Medusa’s Stare
- Carrying and switching to stone-curse immune gear (see Medusa Card and Evil Druid Card) is recommended. Alternatively, ask your Archbishop to stay away from Wide Stone Curse AoE to recover party members.
- Phreeoni can hide.
- Have your detecting skills/gear handy (see Horong Card)
- Element: Neutral 3

- Maya (Floor 15)
- Element: Earth 4
- Use Fire.
- Race: Insect
- HP: 380,000
- Casts some earth-element skills like Heaven’s Drive.
- Earth-property armor is handy but not needed.
- Also casts Brandish Spear which does some damage.
- Can break armor.
- Make sure to use Full Chemical Protection.
- Element: Earth 4

- Drake (Floor 20)
- Element: Undead 1
- Use Holy or Fire
- HP: 804,500
- Drake casts high level waterball when attacking and chasing, and the damage is significant.
- Water-property armor/resist is essential here.
- Casts decrease agi and has agi-up.
- When mobs agi-up they will be difficult to hit with physical attacks. Either use crit, perfect hit equipment/skills or switch to magic skills.
- Can break armor.
- Element: Undead 1

- Moonlight Flower (Floor 25)
- Element: Fire 3
- Race: Demon
- HP: 324,000
- Can cast Dispell and Land Protector.
- Casts Mammomite and bolts.
- Can fully strip you (Full Divestment skill)
- FCP ahead.

- White Lady (Floor 30)
- Element Wind 3
- Use Earth.
- Race: Demihuman
- HP: 720,500
- Casts waterball too.
- Water property armor helps.
- Element Wind 3

- Turtle General (Floor 35)
- Element: Earth 2
- Race: Brute
- HP: 1,442,000
- Casts waterball too.
- Water property armor helps.
- Also uses Sonic Blow.
- Can break your weapon.
- FCP ahead.

- Incantation Samurai/Samurai Spectre (Floor 40)
- Element: Dark/Shadow 3
- Use Holy or secondarily, Neutral
- Race: Demihuman
- HP: 901,000
- Watch out for Hell’s Judgment.
- When melee range (until 4 cells from boss), use safety wall.
- When in range (at least 4 cells away from boss), use pneuma.
- Soul Destroyer and Critical Slash hurts a bit too.
- He uses agi up and fury/power up at 30% HP.
- When monsters agi-up they will be difficult to hit with physical attacks. Either use crit, perfect hit equipment/skills or switch to magic skills.
- Fury increases the boss’s ATK and HIT rate.
- Breaks armor.
- FCP ahead.
- Element: Dark/Shadow 3

- Osiris (Floor 45)
- Element: Undead 4
- Use Holy or Fire
- Race: Undead
- HP: 1,175,840
- Casts meteor assault, darkness breath, venom dust, dark thunder
- He uses agi up and fury/power at 30% HP as well.
- Element: Undead 4

- Pharaoh (Floor 50)
- Element: Dark/Shadow 3
- Use holy, or secondarily, neutral
- Race: Demihuman
- HP: 900,000
- He casts Dark Soul Strike.
- Use Evil Druid (ED)/bathory armor.
- Also casts Thunderstorm.
- Watch our for Darkness Blessing. He casts this at 5% chance when attacking. This reduces your HP to 1 instantly.
- Prepare instant pots/yggs.
- Powers up/Fury at 30% HP.
- Element: Dark/Shadow 3
- Amon Ra (Floor 50)
- Element: Earth 3.
- Use fire.
- Race: Demihuman
- HP: 1,0009,000
- You can safely kite him from max distance using a range character or a magic character.
- He casts Meteor Storm when players are near.
- Fire property armor or fire resist potion is useful.
- Ask your Sorcerer to use Land Protector for this fight
- Avoid stepping on fire pillars.
- Watch for his elemental immunities.
- See section on Green Aura MVP skills above.
- Element: Earth 3.

- Evil Snake Lord (Floor 55)
- Element Ghost 3!
- Use ghost. Avoid neutral.
- Race: Beast/Brute
- HP: 1,101,000
- Watch out for Dragonfear. It can stun, curse, bleed, or silence players around the boss.
- Prepare your archbishop and/or your green pots/panacea.
- He also uses frost diver.
- Marc armor helps.
- He can break shield.
- FCP ahead.
- Powers Up/Fury at 30% HP.
- Element Ghost 3!

- Doppelganger (Floor 60)
- Element: Dark 3
- Use Holy, then secondarily, Neutral.
- Race: Demon (not demihuman!)
- HP: 380,000
- Uses clashing spiral and weapon quicken.
- Watch out for stun from hamer fall.
- Fury/Power Up at 30% HP.
- Given his other damage-incresing skills, he is deadly when in fury state. Kill him fast.
- Stack resist against bosses/neutral damage
- Breaks Armor
- FCP ahead.
- Element: Dark 3

- Egnigem Cenia/Ygnizem Cenia (Floor 60)
- Element: Fire 2
- Use Water
- Note: She can change element to Wind or Water. Change elements accordingly or use Neutral to be safe.
- Race: Demihuman
- HP: 2,910,088
- She has no green aura as of this patch though.
- Uses bash, magnum break, clashing spiral
- Breaks shield.
- FCP ahead.
- Element: Fire 2

- Atroce (Floor 65)
- Element: Dark/Shadow 3.
- Use holy, then secondarily, neutral.
- Race: Beast
- HP: 1,502,000
- Has Pulse Strike (looks like Meteor Assault).
- This damages and knocks you back from the boss. Anti-knockback gear will help (see Antonio’s Coat)
- Has 20% chance to use power up/fury at the get go (even at high health).
- He uses power up/fury at 30% HP as well.
- He uses agi up at 20%.
- His damage is a threat at fury/agi-up stage. Kill him fast.
- Element: Dark/Shadow 3.

- Orc Hero (Floor 70)
- Element: Earth 2
- Use fire
- Race: Demihuman
- HP: 362,000
- Uses clashing spiral and thunderstorm
- Powers up at 30%
- Breaks armor
- Element: Earth 2

- Orc Lord (Floor 70)
- Element: Earth 2
- Use fire
- Race: Demihuman
- HP: 552,000
- Uses Earthquake (see Tips section above)
- Watch out for stun from Hammer Fall
- Powers up at 30%
- Uses Agi Up
- Breaks Shield
- Element: Earth 2

- Dark Lord (Floor 75)
- Element: Undead 4
- Use Holy or Fire
- Race: Demon
- HP: 1,190,000
- Casts Meteor Storm
- Fire-carded armor or fire potions will be handy
- ask your Sorcerer to use Land Protector for this boss
- Uses Hell’s Judgment
- When melee range (until 4 cells from boss), use safety wall.
- When in range (at least 4 cells away from boss), use pneuma.
- Has Dispell
- Element: Undead 4

- Baphomet (Floor 75)
- Element: Dark 3
- Use Holy, then secondarily, Neutral
- Race: Demon
- HP: 668,000
- Casts Dark Soul Strike
- Shadow armor would be handy for the tank.
- Casts Lord of Vermillion
- For the party, wind-property armor or resist potions would be handy
- Ask you Sorcerer to use Land Protector for this fight.
- Casts Earthquake (see Tips option above)
- Breaks Armor
- Powers up at 30%
- Element: Dark 3

- Fallen Bishop Hibram (Floor 80)
- Element: Dark 2
- Use holy, then secondarily, neutral
- Race: Demon
- HP: 5,655,000
- He uses a combination of Holy and Shadow skills (both the holy and shadow versions of Grand Cross and Holy Cross), but shadow property triggers more.
- Recommended to use Evil Druid Armor. This helps with dark soul strikes as well.
- Watch out for Magic Mirror. This reflects magic damage for 30 seconds [duration to confirm].
- Wait out the period or switch to physical DPS.
- Casts Hell’s Judgment.
- When melee range (until 4 cells from boss), use safety wall.
- When in range (at least 4 cells away from boss), use pneuma.
- Kiting him is recommended if in a solo/duo/trio party.
- He walks slow.
- His Magic Mirror does not trigger when being kited.
- He does not use holy attacks when being kited.
- Watch out for wide curse/cursed fate and wide silence/demonic bedlam
- Bring holy water and green potion/panacea.
- Watch out for Evil Land. It does significant DPS and pierces through most defensive skills.
- Element: Dark 2
- Ifrit (Floor 85)
- Element Fire 4
- Use Water
- Race: Formless
- HP: 6,935,000
- He casts Meteor Storm a lot
- Wear/use fire-carded armor or fire resist potions
- Ask your Sorcerer to use Land Protector for this boss
- Can strip you naked with Full Divestment.
- Use Full Chemical Protection
- Uses Land Protector/Magnetic Earth. use that to your advantage
- Tip: if needed, your Sorcerer can cancel Ifrit’s Land Protector with another Land Protector
- Watch out for Earthquake at 40% HP (see Tips Section)
- Has Dispell
- Fury/Powers up at 30%
- Fury increases the boss’s ATK and HIT rate.
- Element Fire 4

- Valkyrie Randgris (Floor 90)
- Element: Holy 4
- Use Shadow, then secondarily, Neutral
- Important note: elemental attacks and magic will miss.
- Race: Angel
- HP: 3,205,000
- Uses dispell upon first sight.
- Watch out for earthquake.
- Uses Lord of Vermillion
- Wind armor or wind resist potion is handy
- Ask your Sorcerer to use Land Protector for this boss
- Powers up and uses Agi Up at 30%
- When monsters agi-up they will be difficult to hit with physical attacks. Either use crit, perfect hit equipment/skills or switch to magic skills.
- Fury increases the boss’s ATK and HIT rate.
- Her autoattacks coupled with the autoattacks of her summons hurt a lot. Stack neutral/boss resist gears.
- General Tips
- The tank should use a lot of boss/neutral resists and holy element armor for holy cross.
- Tank should be ready to recast Mental Strength after first dispell.
- Whole party should be in Land Protector.
- Whole party should tank earthquake.
- Element: Holy 4

- Beelzebub (Floor 95)
- Element: Ghost 4
- Use Ghost or secondarily, other elements (except poison)
- Note: Neutral attacks will miss
- Race: Demon
- HP: 4,805,000
- Note: Beelzebub has two phases/forms.
- If you want the loot, do not rush-kill the first phase (small bee form). Damage the first phase enough until you see a long cast time. It will transform to its Hell Form/True Form after the cast time (looks like big bee). Kill it during this phase/form.
- If your party is not confident to handle its second phase, it might be better to kill it at phase 1 to proceed with the instance.
- His summons use wind spells. Wearing wind armor or using wind resist potions will help.
- He mostly does neutral damage. Stacking neutral resist like Deviling Card will immensely help for this fight.
- He casts Stone Skin and Mass Stone. Wearing medusa card is recommended.
- Casts Hell’s Judgement
- When melee range (until 4 cells from boss), use safety wall.
- When in range (at least 4 cells away from boss), use pneuma.
- Uses Land Protector/Magnetic Earth.
- Tip: your Sorcerer can cancel Beelze’s Land Protector with another Land Protector
- Watch out for Vampire Gift (painful melee physical damage)
- Safety wall blocks this
- Uses Magic Mirror
- Stop magical attacks during the duration
- Watch out for Evil Land
- It pierces through most defensive maneuvers.
- Breaks shield
- Element: Ghost 4

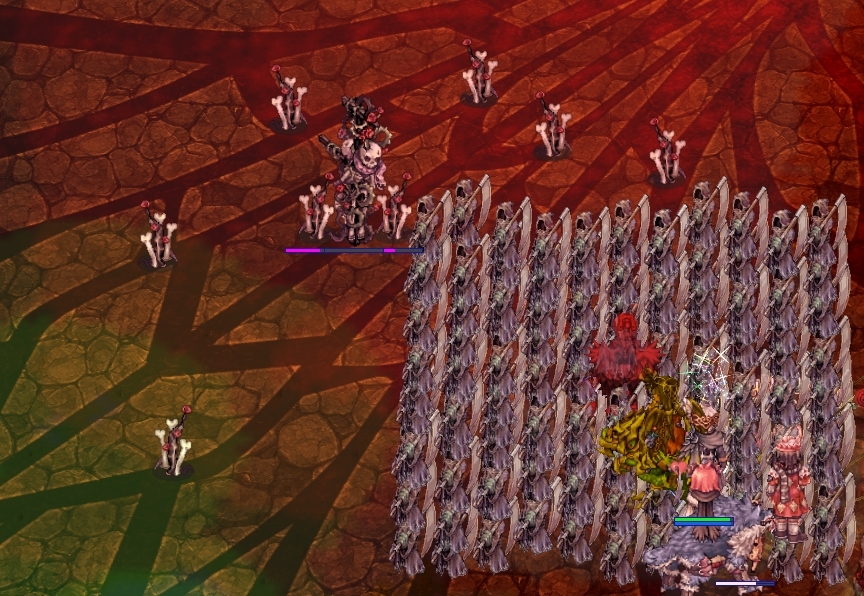
- Entweihen Crothen (Floor 100)
- Element: Dark 4
- Use holy, then secondarily, neutral
- Race: Demon
- HP: 2,400,500
- Uses Dark Soul Strike
- Casts Meteor Storm
- Wear fire-elemental armor or use fire resist potions
- He is immobile but has thorn mobs protecting him.
- To safely go near him, kill the thorns one by one.
- Note: Killing the thorns is not required to finish the boss. You can go straight to the boss if you have skills/gear to burst damage him.
- His attacks are range, ask your Arch Bishop to spam pneuma.
- He uses Defender. Long range attacks will deal less damage.
- Casts Soul Destroyer, Pulse Strike, Dark Soul Strike
- Casts Cursed Fate/Wide Curse
- Medusa shield will be handy
- Ask your ArchBishop to recover/clementia the party regularly
- Element: Dark 4

- Naght Seiger (Floor 101)
- Element: Ghost 4
- Use Ghost or secondarily, other elements (except poison)
- Note: Neutral attacks will miss
- Race: Demon
- HP: 5,000,000
- No green aura as of this patch
- Casts Storm Gust and Meteor Storm
- Best to wear anti-freeze gear (Marc Card)
- Ask your Sorcerer to cast Land Protector for this fight
- He is permanently in agi up.
- Casts Demonic Bedlam/Wide Silence.
- Keep green potions handy
- Breaks Shield
- Element: Ghost 4
List of Mobs per Floor:
Floor 1
15 Metaling
5 Drops
5 Marin
5 Poporing
5 Poring
1 Mastering
Floor 2
20 Desert Wolf
10 Baby Desert Wolf
1 Vagabond Wolf
Floor 3
5 Archer Skeleton
5 Orc Skeleton
5 Pirate Skeleton
5 Soldier Skeleton
5 Skel Worker
5 Skeleton
Floor 4
15 Argiope
5 Argos
5 Hornet
5 Mantis
5 Rocker
1 Vocal
Floor 5
15 Female Thief Bug
15 Male Thief Bug
15 Thief Bug
5 Thiefbug Egg
1 Golden Thiefbug
Floor 6
5 Dragon Egg
5 Pecopeco Egg
5 Pupa
5 Thiefbug Egg
Floor 7
15 Anopheles
15 Drainlair
15 Explosion
15 Familiar
Floor 8
15 Cruiser
15 Firelock Soldier
Floor 9
15 Golem
15 Obsidian
10 Stapo
Floor 10
25 Giant Hornet
20 Hornet
1 Mistress
Floor 11
15 Dryad
15 Hermit Plant
15 Parasite
15 Rafflesia
Floor 12
25 Demon Pungus
25 Punk
Floor 13
15 Bongun
15 Yao Jun
10 Munak
Floor 14
15 High Orc
10 Orc Archer
10 Orc Lady
5 Orc Baby
5 Orc Warrior
Floor 15
15 Andre
15 Deniro
15 Piere
5 Ant Egg
1 Phreeoni
1 Maya
Floor 16
10 Archer Skeleton
10 Gargoyle
10 Orc Archer
10 Raydric Archer
Floor 17
15 Strouf
10 Baphomet Jr.
10 Merman
5 Hill Wind (Spear)
Floor 18
25 Cramp
15 Tarou
Floor 19
10 Deviace
10 Megalodon
10 Phen
10 Swordfish
Floor 20
50 Pirate Skeleton
1 Drake
Floor 21
10 Plasma (Purple)
10 Plasma (Yellow)
5 Plasma (Blue)
5 Plasma (Green)
5 Plasma (Red)
Floor 22
15 Drosera
15 Flora
15 Hydra
15 Muscipular
15 Mandragora
15 Rafflesia
Floor 23
15 Penomena
10 Marse
10 Obeaune
10 Swordfish
5 Hydra
Floor 24
15 Carat
15 Joker
10 Jakk
Floor 25
15 Cat o’ Nine Tails
15 Ninetails
1 Moonlight Flower
Floor 26
10 Enchanted Peach Tree
10 Gibbet
10 Stone Shooter
10 Wooden Golem
5 Elder Willow
Floor 27
10 Goblin Archer
10 Goblin (Dagger)
5 Goblin (Axe)
5 Goblin (Flail)
5 Goblin (Hammer)
5 Goblin (Morning Star)
Floor 28
30 Arclouse
15 Neraid
15 Pest
10 Kukre
Floor 29
10 Dark Frame
10 Heirozoist
10 The Paper
10 Whisper
5 Lude
5 Quve
Floor 30
30 Evil Nymph
1 White Lady
Floor 31
20 Gig
15 Iron Fist
10 Argiope
5 Scorpion
Floor 32
10 Goblin Archer
10 Goblin (Dagger)
5 Goblin (Axe)
5 Goblin (Flail)
5 Goblin (Hammer)
5 Goblin (Morning Star)
1 Goblin Leader
Floor 33
15 Kobold Archer
15 Kobold (Axe)
10 Kobold (Hammer)
5 Kobold (Morning Star)
1 Kobold Leader
Floor 34
20 Flame Skull
10 Giant Whisper
10 Whisper
Floor 35
10 Freezer
10 Heater
10 Permeter
10 Assaulter
10 Solider
1 Turtle General
Floor 36
30 Anolian
10 Alligator
10 Grove
Floor 37
30 Alarm
10 Clock
10 Tower Keeper
Floor 38
25 Deathword
25 Rideword
Floor 39
10 Evil Nymph
10 Mao Guai
10 Zhu Po Long
10 Taoist Hermit
5 Jing Guai
Floor 40
10 Miyabi Doll
10 Shinobi
10 Tengu
5 Firelock Soldier
5 Karakasa
1 Samurai Specter
Floor 41
50 Kraben
Floor 42
20 Sleeper
10 Mi Gao
10 Sting
5 Hode
5 Sandman
Floor 43
40 Side Winder
10 Medusa
5 Anacondaq
5 Boa
Floor 44
20 Baphomet Jr.
20 Hatii Babe
10 Baby Desert Wolf
10 Savage Babe
1 Baby Orc
Floor 45
15 Mummy
15 Ancient Mummy
15 Verit
1 Osiris
Floor 46
20 Beholder
20 Seeker
Floor 47
20 Deleter (Sky)
10 Deleter (Earth)
10 Petite (Sky)
10 Petite (Earth)
Floor 48
10 Ancient Mimic
10 Ancient Mummy
10 Ancient Worm
Floor 49
20 Grizzly
7 Leib Olmai
5 Bigfoot
5 Sasquatch
5 Zipper Bear
Floor 50
10 Anubis
10 Matyr
10 Marduk
1 Amon Ra
1 Pharaoh
Floor 51
20 Diabolic
20 Mini Demon
10 Deviruchi
Floor 52
20 Harpy
10 Bloody Butterfly
10 Gargoyle
10 Grand Peco
5 Hill Wind
5 Hill Wind (Spear)
Floor 53
30 Shinobi
25 Assaulter
Floor 54
10 Chepet
10 Marionette
10 Miyabi Doll
Floor 55
25 Medusa
15 Isis
15 Sidewinder
1 Evil Snake Lord
Floor 56
15 Ice Titan
10 Freezer
10 Gazeti
10 Hatii Babe
10 Snowier
Floor 57
25 Metaling
5 Drops
5 Marin
5 Poporing
1 Mastering
1 Ghostring
1 Angeling
1 Deviling
1 Arc Angeling
Floor 58
20 Phendark
10 Rybio
10 Zombie Prisoner
5 Injustice
5 Skel Prisoner
Floor 59
30 Ancient Mimic
20 Mimic
10 Mystcase
Floor 60
10 Egnigem Cenia
10 Errende Ebecee
10 Kavatch Icarus
10 Laurell Weinder
10 Whickebine Tres
10 Armeyer Dinze
1 Doppelganger
1 Egigem Cenia (Boss)
Floor 61
10 Agav
10 Echio
10 Mobster
10 Pasana
5 Isilla
5 Vanberk
Floor 62
35 Wanderer
Floor 63
20 Ragged Zombie
10 Zombie Master
5 Orc Zombie
5 Zombie Prisoner
5 Zombie
Floor 64
30 Ungoliant
2 Ancient Worm
2 Caterpillar
2 Creamy Fear
2 Giant Hornet
2 Killer Mantis
Floor 65
20 Galion
1 Atroce
Floor 66
20 Incubus
20 Aliot
10 Injustice
Floor 67
10 Acidus (Blue)
10 Acidus (Gold)
10 Mutant Dragonoid
5 Deleter (Sky)
5 Petite (Sky)
Floor 68
18 Stalactic Golem
10 Ice Titan
10 Lava Golem
5 Golem
5 Wooden Golem
Floor 69
20 Dame of Sentinel
10 False Angel
10 Baroness of Retribution
10 Lady Solace
10 Mistress of Shelter
Floor 70
20 Orc Baby
1 Orc Hero
1 Orc Lord
Floor 71
20 Incubus
20 Nightmare Terror
20 Succubus
5 Nightmare
Floor 72
10 Enchanted Peachtree
10 Errende Ebecee
10 Permeter
10 Margaretha Sorin
Floor 73
20 Loli Ruri
10 Aliza
10 Green Maiden
10 Succubus
5 Alice
5 Zealotus
Floor 74
24 Dimik
24 Venatu
6 Archdam
Floor 75
20 Baphomet Jr.
10 Dark Illusion
1 Dark Lord
1 Baphomet
Floor 76
30 Abysmal Knight
20 Nightmare Terror
10 Nightmare
Floor 77
30 Banshee
10 Evil Druid
10 Wind Ghost
10 Wraith Dead
10 Wraith
Floor 78
20 Raydric
10 Bloody Knight
10 Dullahan
5 Sword Guardian
5 Abysmal Knight
Floor 79
10 Ferus (Green)
10 Ferus (Red)
10 Hydrolancer
5 Deleter (Ground)
5 Petit (Ground)
Floor 80
15 Necromancer
1 Fallen Bishop Hibram
Floor 81
20 Mysteltainn
20 Ogretooth
20 Executioner
Floor 82
10 Agav
10 Bloody Knight
10 Bloody Murderer
10 Injustice
10 Skogul
Floor 83
10 Chimera
10 Dark Illusion
10 Gryphon
10 Skeggiold
Floor 84
20 Dark Illusion
10 Incubus
10 Owl Baron
10 Owl Duke
10 Incubus
10 Succubus
Floor 85
1 Ifrit
Floor 86
10 Chimera
10 Gryphon
10 Hydrolancer
10 Majorous
Floor 87
20 Kasa
15 Lava Golem
15 Salamander
10 Gajomart
Floor 88
15 Anubis
15 Necromancer
10 Ancient Mummy
10 Khalitzburg
10 Wraith Dead
Floor 89
6 Odium of Thanatos
6 Despero of Thanatos
6 Maero of Thanatos
6 Dolor of Thanatos
Floor 90
10 Baroness of Retribution
10 False Angel
10 Lady Solace
1 Valkyrie Randgris
Floor 91
30 Kavach Icarus
10 Bow Guardian
10 Cecil Damon
Floor 92
15 Kathryne Keyron
10 Elder
10 Laurell Weinder
10 Marduk
10 Wind Ghost
Floor 93
15 Seyren Windsor
10 Abysmal Knight
10 Bloody Knight
10 Wanderer
Floor 94
15 Sword Guardian
15 Bow Guardian
Floor 95
30 Hunter Fly
5 Chonchon
5 Dragon Fly
5 Steel Chonchon
1 Beelzebub
Floor 96
5 Valkyrie
5 Skeggiold (Brown)
5 Skeggiold (Blue)
Floor 97
5 Incarnation of Morroc (Human)
5 Incarnation of Morroc (Golem)
5 Incarnation of Morroc (Angel)
5 Incarnation of Morroc (Ghost)
Floor 98
2 Seyren Windsor
2 Eremes Guile
2 Howard Alt-Eisen
2 Margaretha Sorin
2 Cecil Damon
2 Kathryne Keyron
Floor 99
Any 7 of the following mobs:
2 Kathryne Keyron
2 Seyren Windsor
2 Margaretha Sorin
2 Eremes Guile
2 Howard Alt-Eisen
2 Cecil Damon
5 Incarnation of Morroc (Angel)
5 Incarnation of Morroc (Human)
5 Incarnation of Morroc (Golem)
5 Incarnation of Morroc (Ghost)
5 Valkyrie
10 Skeggiold (Brown)
10 Skeggiold (Blue)
15 Seyren Windsor
10 Bloody Knight
10 Abysmal Knight
10 Wanderer
15 Sword Guardian
10 Bow Guardian
15 Kathryne Keyron
10 Elder
10 Laurell Weinder
10 Wind Ghost
10 Cecil Damon
10 Bow Guardian
30 Kavach Icarus
10 Baroness of Retribution
10 Lady Solace
10 False Angel
Floor 100
9 Thorn of Bone
7 Thorn of Magic
5 Thorn of Recovery
4 Thorn of Purity
2 other Thorns (any of above)
1 Entweihen Crothen
Floor 101
10 Anopheles
100 Orc Skeleton
60 Wind Ghost
40 Khalitzburg
1 Naght Sieger
Videos
— END (for this patch at least) —
Disclaimer: Some parts of this guide are based off of wikis and other online sources. I disclaim ownership of the parts lifted.
Was this helpful?
10 / 1